Click on the link below to watch my EDCI 306 A Midterm Video!
Month: February 2020 Page 1 of 2
Hello! I hope everyone had a good reading break! This week as we approach the midterm, I have been focusing on learning my second ukulele song “Hakuna Matata” from the hit Disney film, “The Lion King”. When I originally picked this song to learn, I thought it would be a good song to challenge my abilities because it had a few more notes than my first song. However, the song is quite short and I have picked it up quite quickly. The chords for this song include the following: C, F, G, D, G7, Am. Since this song has a simple strumming pattern, I am focusing on making smooth chord transitions between notes.
I have also decided to learn a third song before the midterm as I believe I can challenge myself. The third song I chose was “Kiss the Girl” from The Little Mermaid. What I like about this song is that it only has 3 chords (C, G, F) but has a quicker tempo compared to the other two songs. Currently, I am working on singing and playing at the same time. The strumming pattern is the same in this song as it is in “Someone to Lava” which is helping to reaffirm my confidence in my playing. I chose these first three songs because they are all from Disney movies and are familiar to children.
The most challenging part of this musical growth plan has been gaining the confidence to play and sing at the same time. I have been practicing about 3 times a week to improve my skills. I hope that for the second half of the semester, I can continue to improve my strumming patterns and learn the song “Mamma Mia”.
– Ms. G 🙂
Welcome back to another exciting blog of me attempting to learn how to play the ukulele. Over the past few weeks, I began practicing the first of the three songs that I had set out to learn in my musical growth plan.
The first song “Someone to Lava” comes from the Disney Pixar animated short film called “Lava” which can be found in the link above. I was inspired to learn this song as it has a sweet happy melody and sends a positive message to students. When I originally looked into the notes of this song, the easiest version was written to include the notes “C, F, G7”. After I practiced those three notes, I discovered there was another version of the song that required 5 notes, “C, F, G, G7, C7”. I then decided to attempt this version and found that the 2 extra notes provided more dynamic to the overall piece. I am currently working on adding the strumming pattern of “DD UU DU” as well as increasing my tempo to match the original speed of the piece. Furthermore, I still am having trouble holding the ukulele in the correct position. I find that while I am transitioning between notes, the ukulele slips out of place and my right arm cannot keep it pinched in place. To improve this, I have been practicing the ukulele while standing so I do not rely on my lap to support it.
Over the next few weeks before the midterm, I will continue to practice “Someone to Lava” and also begin to learn the notes to “Hakuna Matata”. I had originally hoped to have learned both of these songs before the midterm, but I think I will most likely be able to fully master the first song and still be learning the second song by that date.
– Ms. G 🙂
Welcome back!
This week for my inquiry I decided to take a break from classroom integration and focus on how individuals can utilize technology to develop their ASL skills. As I stated in an earlier blog, my experience learning ASL began in Spring 2019 when I took ASL 100 A at the University of Victoria. This classed used an immersion technique where we were unable to speak during the lecture which took place twice a week for 2 hours. My professor, Tim Lane, did an excellent job of teaching us the basics of ASL as well as the importance of deaf culture. However, this led me to wonder how else can a person learn sign language in a fun and interesting way.
Here are a few interesting ways I personally discovered that can be accessed through the internet!
- Applications → When I looked on the app store, I, unfortunately, did not find a huge selection of apps that can help you learn sign language. Nevertheless, here is a link to some of the best apps to practice sign language. There is a range from free-paid premium apps, but I have yet to personally try any and I will let you know if I do find any that I really like! https://www.healthyhearing.com/report/47829-The-best-apps-for-learning-sign-language
- Videos → The use of videos for ASL is so important as it is a visual language that relies on physical cues to converse with someone. I have watched a variety of videos and listed below are 3 YouTubers who I think have great instructional videos that could be used in the classroom.
- Online Dictionaries → The most helpful resource I found when I was beginning to learn ASL was the use of online dictionaries. In particular, Hand Speak is a great website the provides videos with particular words to show exactly how a human would sign, rather than simply using charts. They also allow you to slow down the speed of videos so you can truly see the intricacies of the sign.

Photo by Edho Pratama on Unsplash
Those are just a few helpful resources that you can use to develop your students and your own ASL skills. I will see you all in 2 weeks as I will not be posting this upcoming week due to reading break!
– Ms. G 🙂
Hey Everyone! Welcome back to another exciting blog post!

Photo by Benjamin Dada on Unsplash
Before taking the exam to become Google Certified Educator Level 1’s, we have to go through a number of readings, videos and activities that will help us learn how to integrate Google into our future classrooms.
There are 13 units to complete that cover engaging in professional growth and leadership, increasing efficiency and saving time, facilitating and inspiring student learning and creativity
These units are set up to record your progress as you go, and so that you can start and stop lessons at any time. This is a really great feature since it allows you to progress through the units without having to dedicate large amounts of time to complete lessons. Any spare time can easily be used to work through this fundamental training.
Another convenient feature is that you can see how many lessons each unit consists of, as well as the approximate amount of time required to complete each unit.
Throughout this next week, we will begin working through unit 1, Get Ready to Use Technology in the Classroom. It is supposed to take about 85 minutes and has 5 lessons within it.
Thanks! Lauren, Sarah, and Heather
Today, we had a guest speaker come in to teach us about online safety in the classroom. His name is Jesse Miller and he specializes in online safety and helped to develop the “erase bullying” program. He also started a company called “mediated reality” that evolved from his master’s research.
He began his presentation by discussing the difference between generations and how technology is different in today’s society. He suggested that in today’s time, we need to consider the quality of content we are looking at as opposed to focusing on the duration of time we spend on technology. He highlighted three major components about network citizenship which include the following: digital identity, digital rights, digital literacy. He highlighted that it is important as professionals to set up your personal and professional divides between yourself and your career.
He further branched into the conversation about how parents view children using technology and social media. One key point he discussed was how authentic headlines and articles can send false messages to the general public. People often share their opinions without any evidence or with little evidence to state the opinion they want to hear.
Social Media:
What is social media worth to do? Jesse throughout his presentation highlighted how companies sell your information in return to provide an opportunity. As teachers, we have to be extremely cautious about the way in which we use social media. You cannot post a picture of any student on social media without proper consent. We have a duty of care and responsibility to ensure safety with our students. I thought that Jesse’s presentation was very eye-opening towards our actions on social media and how we need to be aware of how we are perceived by the public. I think moving forward I will continue to be mindful of my digital footprint.
After his presentation, we had the opportunity to practice our video editing skills on iMovie. Click on the video below to see how I used the green screen feature to put chickens in the ocean!
Hello! I hope everyone had a great week and is ready for another exciting entry of Ms. G’s free inquiry! Over the past week, I have been considering what ways you can implement ASL into other subject areas. As you know, languages naturally fit into language arts as they part of communication. For today, I have decided to look into how ASL can be used when teaching mathematics.
Last week, I introduced the concept of numbers #1-20 and thought how can we use signing to teach math. Through my research, I found a website called the ASL-STEM Forum that lists math terminology with words from “add” all the way to “Transcendental Number”. Most of these signs are above and elementary level but can be a useful resource for students in the future. What I liked about this website is that it provided a dictionary definition of the various words as well.
Here is a list with links to some of the words you may use in an elementary classroom:
In sign language, when you are signing an equation, it is phrased slightly different than if you are speaking. For example, if you were signing “4+3=?”, you would sign the number 4, plus, the number 3, and the sign how many? In ASL, when you ask a question, the question word goes at the end of the sentence. Math sentences often as a question to a problem, which is why you ask the word how many at the end.
For more information, check out the textbook Naturally Signing or head to the youtube page below to watch videos on other mathematical ASL lessons.
– Ms. G 🙂
History of Google
- Created by Larry Page and Sergey Brin
- Sergey went to Stanford and Larry was considering attending in 1995
- Google was founded in 1998
- Started creating in their dorm rooms → originally called “Backrub”

Photo by Mitchell Luo on Unsplash
Our Inquiry
- We intend on becoming certified Google Educators because we believe it is a useful skill that will make us even better technology educators.
- We have seen the GSuite being used throughout the schools that we have visited so far and want to be able to work well wherever we end up subbing or teaching permanently.
Why We Chose This Inquiry
- Emma, a practicing teacher and one of our seminar leaders from last semester, is a google innovator and encouraged all of us to also pursue this education for our careers.
Google For Education: Teacher Center
- This website provides us with the information that we need in order to train for becoming Google Educators Level 1.
- The Fundamentals Training part of the website will prepare us with modules and lessons that will show us how to integrate google into our future classrooms. We will go more into depth into this section for our next blog post.
- We can study for the test using these sample questions.
Potential Downfalls of Becoming Google Educators Level 1
- We could have tunnel-vision and only use google suite apps. By doing this, we may not find other helpful apps and technologies.
Thanks for tuning in and check back next week for our progress in becoming Google Educators Level 1!
Sincerely,
Sarah, Heather, and Lauren B
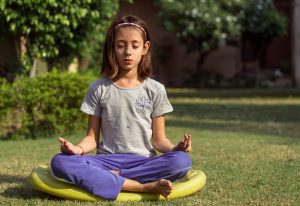
Meditation Apps:
- Stop, Breathe & Think → Free: A mindfulness app designed for students with anxiety disorders that uses meditation and other breathing techniques to regulate their emotions.
- Pacifica → Ranked as one of Apple’s “Best Mental Health Apps”. This app allows you to track how you are feeling. It also has a unique audio playlist that you can use when feeling anxious.
- Cons: Free but also has a paid option of $3.00 a month
- Headspace → A meditation app for teachers to use in the classroom. Has a series of 10-minute voice-guided meditation exercises that students can follow.
- Dreamy Kid → an app that offers meditation “guided visualizations and affirmations” to help kids and teens to work towards a happier and more mindful life.
- Happify → games that are designed to conquer stress and make you happier. These games are tailored to your specific needs based on an entrance quiz.
- Cons: Free but Happify + costs $11.65 a month
Analysis → These apps allow students and teachers to have a guided form for students to combat their anxiety. This is an excellent tool for teachers as often they cannot always support a student who may suffer from anxiety, and using apps allows students to self-regulate their emotions. However, we did notice that many of the apps require payment for additional materials and students are unable to do so. Also, additional investigation is necessary as we would have to ensure the security of the student and their privacy.
Other Apps:
- Recolour → a digital colouring app that allows you to select from a variety of photos and colour in using the colour palette you enjoy.
- Super Stretch Yoga → a fun educational tool to teach yoga and the importance of physical activity and mindful breathing.
- Positive Penguins → an interactive and simple tool that helps students understand why they are feeling certain feelings and how they can move forward and feel better. It helps to change the way children process certain experiences and emotions so that they can cope with them in a positive way.
Analysis → These apps are a way to help students cope with anxiety and negative thoughts. They can be a way to re-centre a student, a way to distract them, or a way to teach physical activities that will help them cope with these negative feelings. These are good things to offer in a centre time or free play to allow students to explore coping mechanisms or just have fun while having the benefits of the app.
Videos:
- CosmicKidsYoga
-
- This youtube channel describes this video and others in the same series as a way to “find your centre to help ease worries and anxiety.”
- This could be displayed on a smartboard and the class performs the yoga in front of the screen. If an individual student needs time to calm down, they could bring a computer or iPad into a quiet room and perform some of the yoga.
- GoNoodle Flow
-
- https://family.gonoodle.com/channels/flow
- Positive thinking and relaxation exercises
- This could be displayed in the same way as CosmicKidsYoga
Analysis→ These videos are a great way for students who experience anxiety to still feel included in the classroom because they teach skills that are important for all students to learn such as mindfulness, self-regulation, and managing self-draining emotions. They are presented to the entire class at the same time and promote connectedness and belonging within the classroom community.
Non-Technological Tools We Have Seen In Practice In Schools:
- Squeeze balls, squishies, fidget spinners, fidget balls, water-based toys, going for a walk, riding a stationary bike, noise-cancelling headphones, desk shields, tattle phones etc.
Hey everyone! Here is my first blog post as I embark on my musical journey to learn the ukulele! I was inspired to learn the ukulele as I had picked it up in the 8th grade but never had the opportunity to continue learning it. I feel that the ukulele is an excellent instrument to play in the classroom as it is a small, light instrument that is relatively easy for people of all ages to learn.
This past week, I have worked on learning how to hold and tune the ukulele. When holding your ukulele, it is important to maintain good posture and keep the ukulele propped up so it is not resting in your lap. When you are holding it, put the body of the ukulele under your right arm, and use your right elbow to secure it in place. Then, place your left thumb against the back of the neck on your ukulele. Your fingers on your left hand will then create a “C” like curve around the neck and be in the proper position to play.

Once I determined how to hold the ukulele properly, I worked on learning how to tune the ukulele. A ukulele has 4 strings: G, C, E, A. To tune a ukulele, you turn the tuning pegs to the right or left depending on if you need to make the sound lower or higher. Since I am new to tuning, I had to use a tuning app on my phone to help determine how close I was to the note. Over the next few weeks, I hope to work on tuning the ukulele by ear. I can ensure this by practicing singing the notes myself in tune.
– Ms. G 🙂